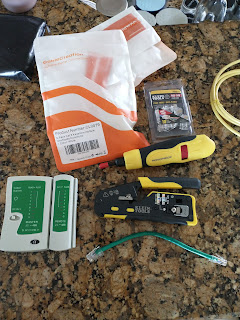
I finally got around to replacing the crappy mesh wifi system with a "real" wifi network. This was my first time running and terminating ethernet cables. I bought some tools to practice with: klein tools cutter, stripper, and male pass-thru crimper, a monoprice impact punch-down tool, and a cable tester. I made a short patch cable for practice, and it came out good on the first try.
Making patch cables is silly since 2 good quality connectors cost more than a pre-made patch cable, so I bought the others I'll need. I bought a partial spool of CAT6 cable off craigslist a year or so ago, and about 50ft of smurf tube conduit from a friend. I wanted to do some future proofing with this upgrade, so I bought Wifi-6 hardware. It took me awhile to figure out exactly what I wanted. I ended up going with a TP-Link AX1800 router because it was cheap and powerful enough to cover half of the house. The wireless access point choice for the other half of the house was a little trickier. I bought a 48 port gigabit POE switch for a steal off reddit last year because I had big plans to wire the whole house with ethernet drops and cameras. Since this is my first post about it, clearly that never happened, but I still plan on slowly adding drops, cameras, etc. That switch is POE standard 802.3af, which is limited to 15W per device. Many of the newer (Wifi-6) WAPs are 802.3at, which has a 30W limit, so if I want to use this switch, which I do, then I can't use 802.3at WAPs. That narrowed the selection substantially, and I ended up going with a Ubiquiti U6-Lite. However, since I only have one POE device at the moment, running the switch would be a waste of electricity, so I bought a POE injector to go with the U6-Lite. Eventually, when I have more devices and ethernet drops, I'll switch to the switch. I did some testing with a super long ethernet cable to figure out the best place for the WAP. Once I had that figured out, it was time to run ethernet there. I wanted to relocate the modem and router to one of the attics, where I plan to have a small rack eventually. That's not the same attic as the one above where the WAP was going, so this ethernet run was kind of a pain. I used cable clips in the attic above where the WAP was going since I wasn't planning to run anymore cables up there anytime soon.
 |
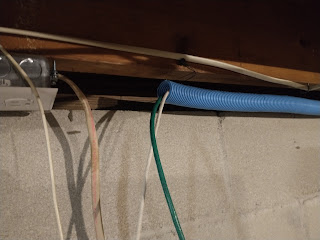
| Green cable is ethernet. |
 |
| Terminated cable. |
I installed the smurf tube in the attic where the router was moved to because I will eventually have many ethernet cables running through there.
 |
| Other end of the WAP cable. |
I pulled string through the conduit with the cable to make adding cables in the future easy. I'm going to terminate all of the ethernet ends with punch-down keystone jacks. Once I get a rack, I'll get a patch panel and mount all of the keystone jacks.
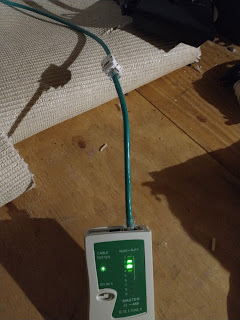 |
| Tested good! |
 |
| Blue = working |
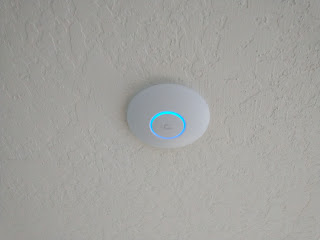
Finally, I had to setup the router and WAP. The router has an easy-to-use web interface. The WAP requires installing Ubiquiti's UniFi Network application on your phone or computer. This picks up a hidden network broadcast by the WAP(s), which then allows you to configure it. I set the WAP SSID and password to be the same as the router's.
Then I walked around with my phone running internet ping and speed tests. Both ping and speed are MUCH better with the new router and 1 WAP than with the mesh wifi system, which had 1 router and 4 satellites. I can actually max out my internet download speed over wifi now.
The next step is to run ethernet drops to the office, which is right below the attic that the router is now in. Then run ethernet drops to other parts of the house and hook up the big switch. Then get a rack and make it all look nice.
Update: ran two drops to office, then stopped. Haven't hooked up the switch yet since there are enough ports in my router.


No comments:
Post a Comment